Creating a DIY ice fishing rod holder is a practical and satisfying project for any angler looking to organize their gear efficiently. This article guides you through the process of planning, constructing, and mounting your own rod holder, as well as providing tips for customization and maintenance. With simple materials and a bit of craftsmanship, you can build a sturdy and personalized storage solution for your ice fishing rods.
Key Takeaways
- A DIY ice fishing rod holder is a straightforward project that requires basic tools like a drill, a 1-1/4″ spade bit, corner braces, and a spare board.
- Assessing the space and the size of your ice fishing rods is crucial before designing the rod holder to ensure a good fit and accessibility.
- The construction process involves measuring and cutting the board, drilling holes for the rods, and sanding for a smooth finish.
- Mount the rod holder using corner brackets for a secure and stable setup, and organize your rods for easy access during your ice fishing trips.
- Personalize your rod holder with finishes or decorations, and perform routine maintenance to ensure its longevity and functionality.
Planning Your Ice Fishing Rod Holder

Assessing Your Space and Rod Requirements
Before diving into the construction of your ice fishing rod holder, it’s crucial to evaluate the space you have available and the specific needs of your rods. Start by measuring the area where you plan to place the rod holder. This will determine the maximum size of the holder and how many rods it can accommodate.
Next, consider the types of rods you’ll be storing. Different rods have varying lengths and handle designs, which will influence the design of your rod holder. For instance, a longer rod will require a holder with greater spacing between slots to prevent tangling.
When planning your rod holder, think about future needs as well. Will you be adding more rods to your collection? Ensure your design is scalable to avoid having to build a new holder too soon.
Finally, organize your tools and materials. A well-organized workspace with all the necessary tools at hand will streamline the building process, making it more efficient and enjoyable.
Choosing the Right Materials
When embarking on the creation of your ice fishing rod holders, selecting the right materials is a pivotal step. The materials you choose will not only impact the durability and functionality of your rod holders but also their aesthetic appeal. Start by considering the environment in which the rod holders will be used; ice fishing demands materials that can withstand cold temperatures and potential moisture exposure.
Here’s a list of materials you might consider for your DIY project:
- Weather-resistant wood (e.g., cedar, teak)
- Corrosion-resistant metals (e.g., stainless steel, aluminum)
- Durable plastics or composites
- Protective coatings or sealants
Remember, the quality of materials you select will directly influence the [fishing rod structure](https://bestfishingrods.com/types-of-fishing-rods/) and its ability to perform under the stresses of ice fishing. It’s essential to balance cost with quality to ensure your rod holders stand the test of time without breaking the bank.
Cost is another crucial factor. While you want materials that are robust and long-lasting, they must also align with your budget. Be mindful of the trade-offs between price and quality, and consider the long-term benefits of investing in higher-quality materials. This decision will not only affect the durability and function of your rod holders but also your satisfaction with the finished product.
Tools and Supplies Needed
Before you begin constructing your ice fishing rod holder, it’s crucial to gather all the necessary tools and supplies. This preparation will ensure a smooth building process and a quality end product. Start by making a comprehensive list of items you’ll need, which will include various cutting and finishing tools, as well as materials for the holder itself.
Here’s a basic list to get you started:
- Cutting Tools (e.g., saws, knives)
- Measuring Tools (e.g., rulers, calipers)
- Drilling Tools (e.g., drill bits, hand drill or power drill)
- Sanding Tools (e.g., sandpaper, sanding blocks)
- Finishing Supplies (e.g., varnish, paint)
- Assembly Aids (e.g., clamps, vices)
Remember, the quality of your tools can greatly affect the ease of construction and the durability of your finished rod holder. Opt for reputable brands and materials that will stand the test of time and use.
Once you have your list ready, consider the suppliers and the quality of materials they offer. High-quality materials are not only crucial for the durability and function of your rod holder but also for the reputation of your DIY project. Whether you’re a seasoned craftsman or a beginner, having the right tools at hand will make the process enjoyable and rewarding.
Constructing the Rod Holder

Measuring and Cutting the Board
Once you have your materials and tools ready, the first step is to cut your board to the desired length. A standard size for a rod holder is 32 inches, but you can adjust this based on the number of rods you plan to store. Use a miter saw for a clean cut, ensuring your board is straight and even.
After cutting, it’s time to mark the placement for your rods. Mark the center-line all the way down the length of the board. Then, measure and mark every 3 inches along the center-line. This spacing allows reels to fit comfortably next to each other without tangling.
Ensure that your drill bit size matches the diameter of your fishing poles. A 1-1/4" spade bit is commonly used, but double-check to avoid any mishaps.
Finally, before drilling, double-check your measurements and marks. Accuracy here is crucial for a functional rod holder.
Drilling Holes for the Rods
Once your board is measured and cut to the desired size, the next step is to drill holes for the rods. Ensure that the spacing between each hole is consistent to provide a uniform look and to prevent the rods from tangling. Use a drill bit that matches the diameter of your fishing rod handles for a snug fit.
- Mark the spots for drilling using a pencil and a ruler.
- Clamp the board securely to your workbench to prevent it from moving.
- Drill the holes vertically to ensure that the rods will stand upright.
- Clean any wood debris from the holes after drilling.
Remember to periodically check the drill bit for wear and tear. A sharp bit makes cleaner cuts and reduces the risk of splitting the wood.
After drilling, you may choose to line the holes with a protective material such as rubber grommets or felt. This step is optional but can protect your rods from scratches and provide additional grip.
Sanding and Finishing Touches
Once the drilling is complete, the next step is to smooth out any rough edges with sanding. Start with a coarser grit sandpaper and work your way to a finer grit for a polished finish. Sanding not only improves the appearance but also ensures the safety of your equipment by removing splinters and sharp edges.
After sanding, it’s time to apply a finish to protect the wood and give it a professional look. You can choose from a variety of finishes such as varnish, stain, or paint, depending on your preference and the conditions it will be exposed to. Here’s a simple list of supplies you might need for finishing:
- Epoxy & Adhesives
- Finishing Brushes
- Paints & Pigments
- Thread Finish
Remember, a well-applied finish can greatly extend the life of your rod holder and keep it looking great for seasons to come.
For those unexpected situations, like a broken fishing rod tip, it’s handy to know some basic repair techniques. Using simple materials such as epoxy, sandpaper, and a dowel rod, you can perform quick repairs with no expertise needed.
Mounting Your Rod Holder
Selecting the Ideal Location
Selecting the ideal location for your ice fishing rod holder is crucial for both accessibility and efficiency. Consider the proximity to your fishing spot to ensure that your rods are within easy reach when you need them. Additionally, think about the environment; you’ll want a spot that’s sheltered from harsh winds and heavy snowfall.
- Evaluate the stability of the ice where you plan to set up.
- Ensure the location is safe and does not interfere with other ice fishing activities.
- Consider the direction of the sun to avoid glare on your rods.
When choosing a location, it’s not just about convenience. It’s also about creating a safe and functional space that enhances your ice fishing experience.
Remember, the location you choose should also allow for easy monitoring of your rods. This way, you can quickly respond to any bites or adjust your setup as needed. Keep in mind that the ideal spot may vary depending on the time of day and weather conditions, so be prepared to make adjustments.
Using Corner Brackets for Secure Attachment
Once you’ve constructed your ice fishing rod holder, it’s crucial to ensure it’s securely attached to prevent any mishaps on the ice. Using corner brackets is an effective way to achieve a sturdy mount. Begin by positioning the brackets at each corner of the rod holder, marking the locations for the screws. It’s important to use screws that are appropriate for the material of your rod holder and the surface it will be attached to.
- Mark the screw locations on both the rod holder and the surface it will be mounted on.
- Drill pilot holes to prevent the wood from splitting.
- Secure the corner brackets with screws, checking for level and stability.
Ensure that all edges and attachment points are sealed properly to avoid any potential damage from the elements. Regular applications of seam grip can help fill any spaces and provide additional reinforcement.
Remember to periodically check the brackets for any signs of wear or loosening. Maintenance is key to the longevity of your DIY project.
Organizing and Placing Your Ice Fishing Rods
Once your ice fishing rod holder is securely mounted to the wall, the final step is to organize and place your rods. Ensure each rod is spaced evenly to prevent tangling and to allow easy access when you’re ready to hit the ice. A good rule of thumb is to leave about 3 inches of space between each rod, as this provides ample room for the reels.
- STEP 1: Begin by placing the rod with the largest reel in the first slot.
- STEP 2: Continue placing the remaining rods in ascending order of reel size.
- STEP 3: Adjust the rods to ensure the handles are aligned and the setup looks neat.
Remember, the goal is to create a functional and organized space that allows you to grab your rods and go without any hassle. Regularly check that the rods are secure and that the holder remains firmly attached to the wall.
For those interested in further customization, consider exploring a guide on making fishing rods at home using materials like bamboo or PVC. This can be a fun project for the entire family and a great way to personalize your ice fishing experience.
Customization and Maintenance Tips
Personalizing Your Rod Holder
Once you’ve constructed your ice fishing rod holder, personalizing it can make it truly yours. Adding custom touches not only enhances the aesthetic appeal but also allows for better functionality tailored to your fishing style. Consider the following ideas to make your rod holder stand out:
- Decals & Stickers: Apply your favorite designs or catchphrases to give your rod holder a unique look.
- Custom Inlays: For a more sophisticated touch, inlays can add an artistic flair.
- Marbling: This technique can create stunning visual effects on the surface of your rod holder.
- Weaving: Incorporate some intricate patterns or your initials using this method.
Remember, the goal is to create a rod holder that reflects your personality and fishing needs. Experiment with different techniques and materials to achieve the desired outcome.
For those interested in further customization, resources such as the [Best Fishing Rods](#) website offer extensive guides and tips on various customization techniques. Whether you’re looking to repair an old rod or build a new one from scratch, these resources can provide valuable insights.
Routine Maintenance for Longevity
To ensure your ice fishing rod holder stands the test of time, routine maintenance is key. Regular inspections for wear and tear can prevent small issues from becoming big problems. Look for signs of wood splitting, metal corrosion, or loose fittings and address them promptly.
- Check for any loose screws or bolts and tighten them as needed.
- If your rod holder is made of wood, reapply a water-resistant sealant annually to protect against moisture.
- For metal holders, use a rust inhibitor to prevent corrosion, especially if you notice any rust forming.
- Clean your rod holder regularly to remove dirt, bait residue, or salt buildup, which can cause materials to degrade over time.
By dedicating a little time to maintenance after each fishing trip, you can greatly extend the life of your rod holder. This proactive approach not only saves you money in the long run but also ensures that your equipment is always ready for your next adventure on the ice.
Troubleshooting Common Issues
When your ice fishing rod holder encounters problems, it’s crucial to identify and address them promptly. Common issues include instability, wear and tear, and difficulty in rod retrieval. To troubleshoot effectively, consider the following steps:
- Inspect the holder for any loose screws or weakened joints and tighten or reinforce as necessary.
- Check for signs of wood rot or corrosion in metal parts, especially if the holder has been exposed to moisture.
- Ensure that the holes are smooth and free of splinters or burrs that could snag your fishing line.
Remember, regular inspection and prompt repair can prevent small issues from becoming major inconveniences.
If problems persist, consult the additional resources section for more in-depth guidance or consider reaching out to experienced ice fishers in your community for advice.
Additional Resources and Ideas

Exploring More DIY Fishing Projects
Once you’ve mastered the art of creating your own ice fishing rod holders, the world of DIY fishing projects awaits. Dive into a variety of crafting opportunities that can enhance your fishing experience and add a personal touch to your gear. From custom rod building to lure making, there’s a project for every angler.
- Custom Rod Building: Tailor your fishing rods to your specific needs and preferences.
- Lure Making: Experiment with different materials and designs to create effective lures.
- Fly Tying: Learn the intricate art of tying your own flies for fly fishing.
- Tackle Crafting: Design and assemble your own tackle for a unique fishing setup.
Embrace the satisfaction of using gear you’ve crafted with your own hands. It not only adds a personal flair but can also lead to a deeper understanding of the mechanics behind fishing.
For those looking to expand their DIY repertoire, our website page provides tips, techniques, and gadgets for various types of fishing rods. Engage with fellow enthusiasts in the comments section to exchange valuable fly fishing techniques and more.
Connecting with the Ice Fishing Community
Joining the ice fishing community can greatly enhance your experience and provide a wealth of knowledge. Engage with fellow enthusiasts to share tips, stories, and even organize outings. Here are a few ways to get involved:
- Participate in local ice fishing clubs or online forums.
- Attend ice fishing expos and workshops to learn from the pros.
- Volunteer for ice fishing events and conservation efforts.
Building connections within the ice fishing community not only enriches your own skills but also contributes to the sport’s sustainability and growth.
Remember, ice fishing is more than a solitary pursuit; it’s a chance to create camaraderie and learn from others who share your passion. Whether you’re looking for advice on the best bait or seeking companions for your next trip, the community is an invaluable resource.
Learning from Expert Rod Builders
When venturing into the world of custom ice fishing rod building, learning from experts can be invaluable. Participating in online or in-person workshops, such as those offered by Mud Hole Live, can provide you with a wealth of knowledge and practical skills. These sessions often cover a range of topics from basic rod building 101 to advanced techniques like marbling and weaving.
To truly excel, consider taking specialized courses or seeking mentorship. This will help you refine your design and crafting abilities, ensuring you can create rods that meet the unique needs of your customers. A deep understanding of rod design and the customization process is crucial for anyone looking to stand out in the market.
Remember, the journey to becoming a proficient rod builder is not just about acquiring the right tools and materials, but also about mastering the art of rod customization and repair.
Connecting with the community through resources like ‘Ice Fishing Tips from SLOCOG Expert Ben Olson‘ can also provide valuable insights. Ben’s advice on choosing line and locating fish can enhance your practical fishing knowledge, complementing your rod building expertise.
Conclusion
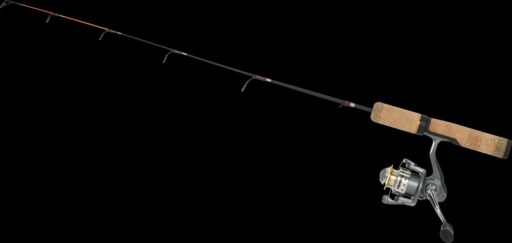
As we wrap up our DIY project on crafting your own ice fishing rod holders, it’s clear that with a bit of creativity and some basic tools, you can create a practical and sturdy rack for your ice fishing adventures. This custom rack not only serves as a functional storage solution but also adds a touch of personal craftsmanship to your gear. Remember, this design is particularly suited for the shorter ice fishing rods, ensuring a perfect fit and balance. If you’ve followed along and built your own, we’d love to hear about your experience and see your finished product. For more DIY projects and fishing tips, don’t hesitate to explore our blog categories or follow us on social media. Tight lines and happy crafting!
Frequently Asked Questions
What materials do I need to build an ice fishing rod holder?
You will need a spare board, a drill, a 1-1/4″ spade bit (or the size that fits your fishing poles), corner braces, a miter saw, an orbital sander, a tape measure, a square, a pencil, safety glasses, and hearing protection.
How far apart should I space the holes for the rods?
You should measure and mark every 3″ along the center-line of the board for the reels to fit comfortably next to each other.
Do I need to finish the rod holder with paint or varnish?
Finishing is optional. You can leave it unfinished if it’s just hanging in the garage, or you can paint or varnish it for extra protection and aesthetics.
Can this rod holder be used for regular fishing poles as well?
This rack is best used for ice fishing rods since they’re shorter. Normal fishing poles might be top-heavy and wouldn’t sit nicely in the holder.
How do I attach the rod holder to the wall?
Attach the rod holder to the wall using corner brackets for secure attachment.
Where can I find more DIY fishing project ideas?
For more project ideas, you can find me on Pinterest, follow me on Instagram, or explore the ‘How-To Media’ and ‘Rod Recipes’ sections on my website.